我们需要在Unity中使用WebCamTexture获取图像,传送到OpenCV中做处理,然后返回到Unity中作显示;Unity通过调用动态链接库so与OpenCV进行通信,最终程序会打包成APK并且在Android上运行。
本文主要参考了: OpenCV
+ Android + Unity How
to Pass Images Between OpenCV and Unity 两篇文章。
系统环境:
Visual Studio 2015
OpenCV 3.4.7
Android API level 19 & 26
Unity 2019.2.5f1
.NET Framework 4.7.2
生成动态链接库
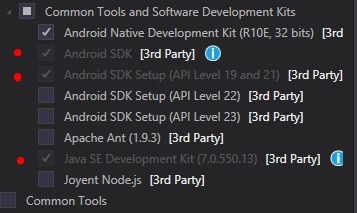
本文使用的是Visual Studio 2015,注意要安装Xamarin和Android SDK:
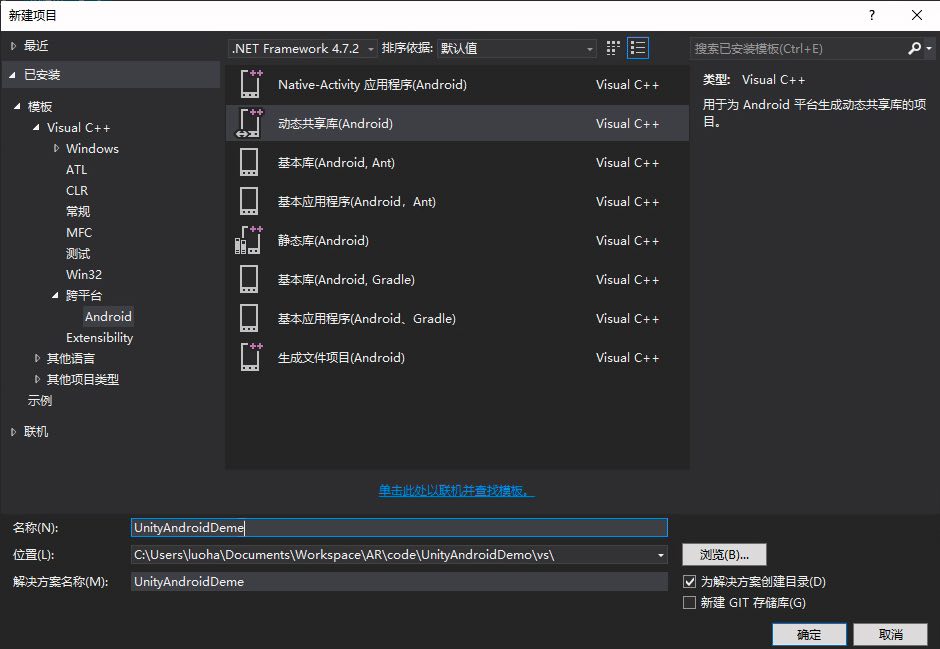
打开Visual
Studio,新建一个Android动态共享库项目UnityAndroidDeme:
vs_android_so
下载opencv-3.4.7-android-sdk 。
项目名字右键->属性->配置属性->C/C++->常规->附加包含目录,添加Path-to-OpenCV-android-sdk\sdk\native\jni\include。
项目名字右键->属性->配置属性->C链接器->常规->附加库目录,添加Path-to-OpenCV-android-sdk\sdk\native\libs\armeabi-v7a。
项目名字右键->属性->配置属性->C链接器->输入->附加依赖项,添加Path-to-OpenCV-android-sdk\sdk\native\libs\armeabi-v7a\libopencv_java3.so,注意这里需要完整的路径。
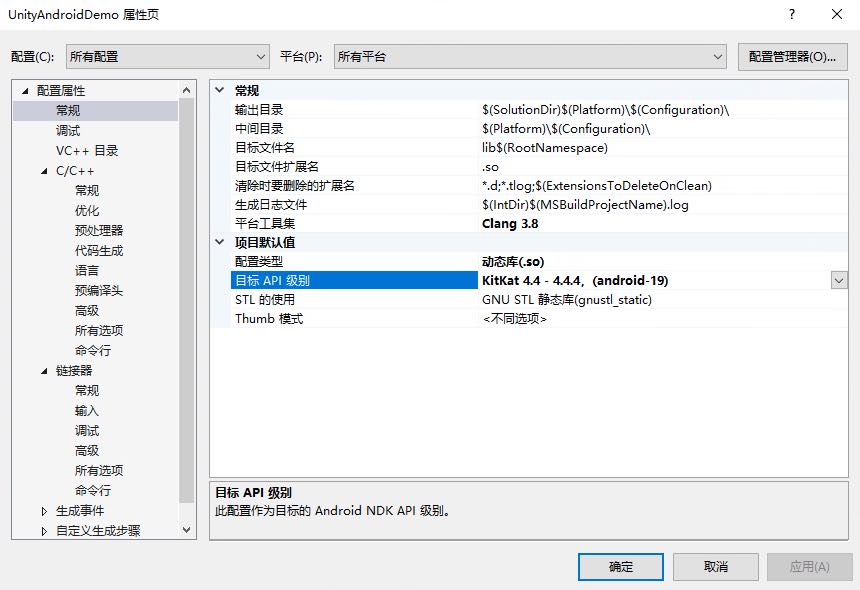
项目名字右键->属性->配置属性->常规->目标API级别,选取KitKat 4.4 - 4.4.4,(android-19)。
vs_kitkat
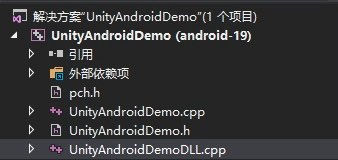
添加文件UnityAndroidDemo.h,UnityAndroidDemo.cpp和UnityAndroidDemoDLL.cpp。
vs_project
UnityAndroidDemo.h:
1 2 3 4 5 6 7 8 9 10 11 12 13 14 15 16 17 18 19 20 21 #pragma once #include <opencv2\core.hpp> #include <opencv2\imgproc\imgproc.hpp> struct Color32 { uchar red; uchar green; uchar blue; uchar alpha; }; class UnityAndroidDemo { public: UnityAndroidDemo(); ~UnityAndroidDemo(); void Canny(Color32 ** img, int width, int height); private: cv::Mat img_; };
UnityAndroidDemo.cpp:
1 2 3 4 5 6 7 8 9 10 11 12 13 14 #include "UnityAndroidDemo.h" UnityAndroidDemo::UnityAndroidDemo() { } UnityAndroidDemo::~UnityAndroidDemo() { } void UnityAndroidDemo::Canny(Color32 ** img, int width, int height) { cv::Mat texture(height, width, CV_8UC4, *img); cv::cvtColor(texture, img_, cv::COLOR_BGRA2GRAY); Canny(img_, img_, 50, 200); cv::cvtColor(img_, texture, cv::COLOR_GRAY2RGBA); }
UnityAndroidDemoDLL.cpp:
1 2 3 4 5 6 7 8 9 10 11 12 13 14 15 16 17 18 19 20 #include "UnityAndroidDemo.h" #define LOGI(...) ((void)__android_log_print(ANDROID_LOG_INFO, "UnityAndroidDemo", __VA_ARGS__)) #define LOGW(...) ((void)__android_log_print(ANDROID_LOG_WARN, "UnityAndroidDemo", __VA_ARGS__)) extern "C" { UnityAndroidDemo* CreateUnityAndroidDemo() { UnityAndroidDemo* obj = new UnityAndroidDemo(); return obj; } void DestroyUnityAndroidDemo(UnityAndroidDemo* obj) { delete obj; obj = NULL; } void Canny(UnityAndroidDemo* obj, Color32 **img, int width, int height) { obj->Canny(img, width, height); } }
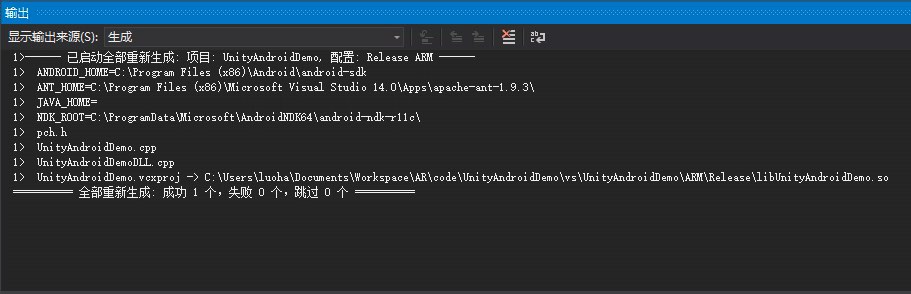
生成Release,ARM版的libUnityAndroidDemo.so。
release_ar
build_output
Unity
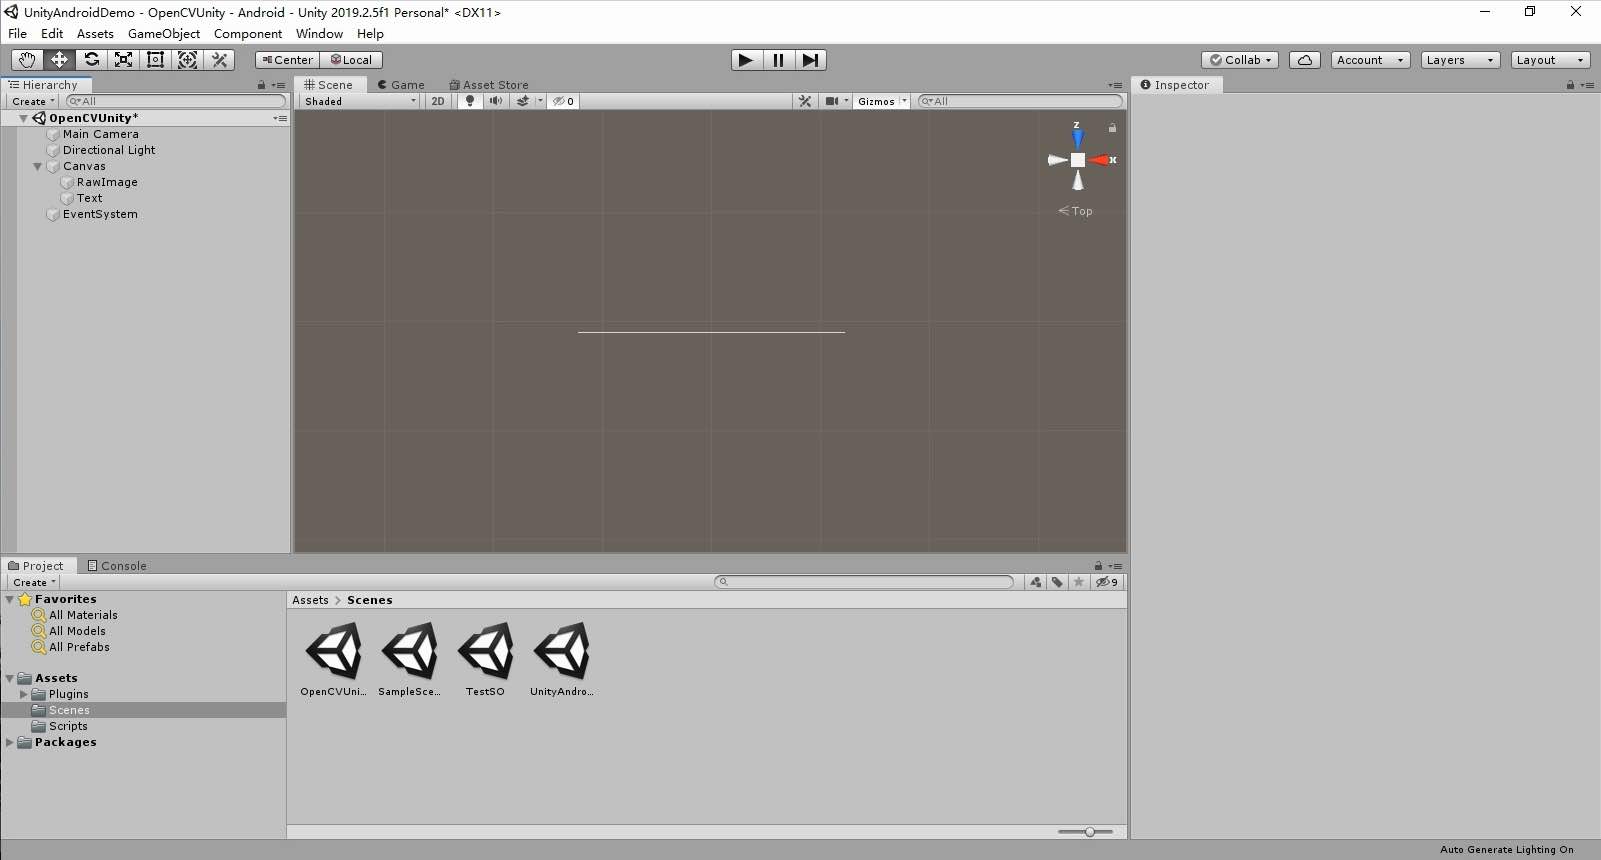
新建一个Unity
3D项目UnityAndroidDemo,将OpenCV的动态链接库libopencv_java3.so和上一步生成的libUnityAndroidDemo.so复制一份放到文件夹Assets\Plugins\Android中。
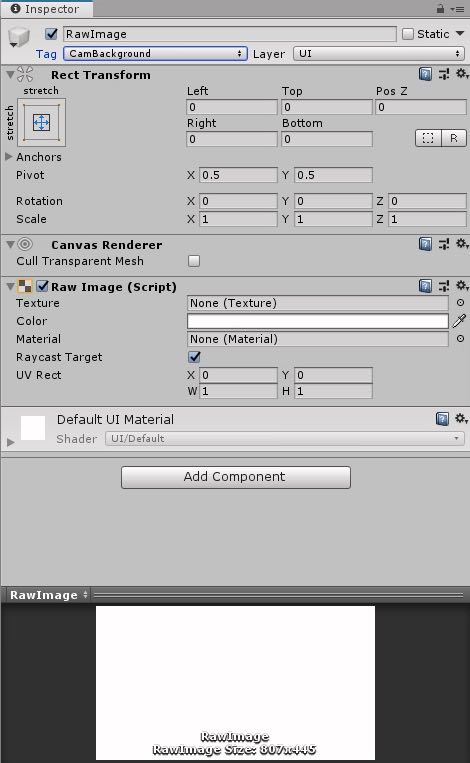
Scenes中添加一张RawImage,新加设置Tag为CamBackground,并设置好Stretch和位置大小等信息。
CamBackground
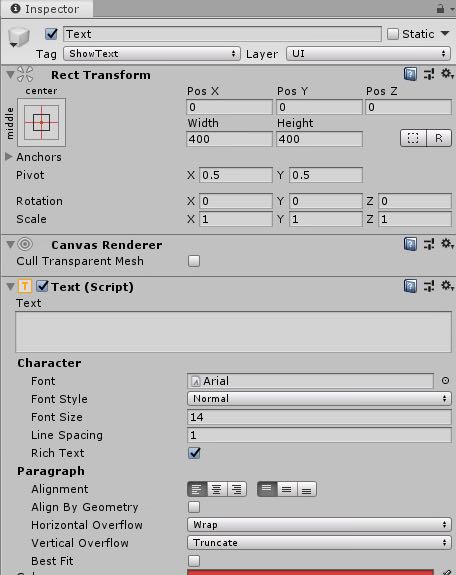
Scenes中添加一个Text,新加设置Tag为ShowText。
showtext
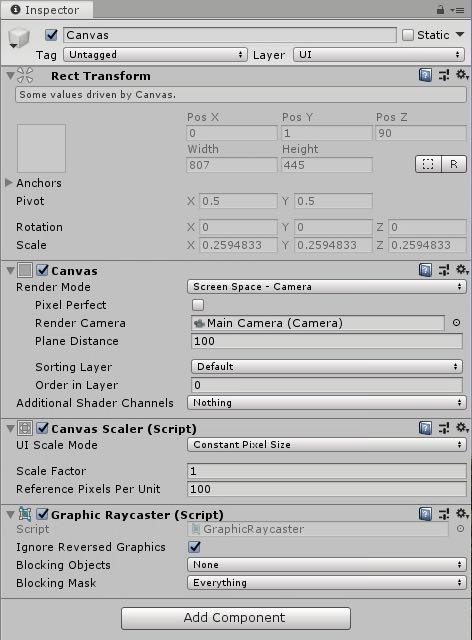
选择RawImage上一层所属的Canvas,Inspector窗口中Render Mode选择Screen Space - Camera,并将Main Camera拉到Render Camera。
canvas
unity_main_project
Main Camera组件中添加一个名为OpenCVUinty的Script。
OpenCVUinty.cs:
1 2 3 4 5 6 7 8 9 10 11 12 13 14 15 16 17 18 19 20 21 22 23 24 25 26 27 28 29 30 31 32 33 34 35 36 37 38 39 40 41 42 43 44 45 46 47 48 49 50 51 52 53 54 55 56 57 58 59 60 61 62 63 64 65 66 67 68 69 70 71 72 73 74 75 76 77 78 79 80 81 82 83 84 85 86 87 88 89 90 91 92 93 94 95 96 97 98 99 100 101 102 103 104 105 106 107 108 109 110 111 112 113 114 115 116 117 118 119 120 121 122 123 124 125 126 127 using System; using System.Collections; using System.Collections.Generic; using System.IO; using UnityEngine; using UnityEngine.UI; using System.Runtime.InteropServices; public class OpenCVUinty : MonoBehaviour { [DllImport("UnityAndroidDemo")] private static extern IntPtr CreateUnityAndroidDemo(); [DllImport("UnityAndroidDemo")] private static extern void DestroyUnityAndroidDemo(IntPtr obj); [DllImport("UnityAndroidDemo")] private static extern double Add(IntPtr obj, double x, double y); [DllImport("UnityAndroidDemo")] private static extern void Threshold(IntPtr obj, ref Color32[] img, int width, int height); private IntPtr UnityAndroidDemo = IntPtr.Zero; public int width = 640; public int height = 480; public int fps = 30; private WebCamTexture cam = null; public string cam_name = "Integrated Camera"; private Color32[] cam_data = null; private Texture2D tex = null; private Text show_text = null; private RawImage background = null; // Start is called before the first frame update IEnumerator Start() { yield return Application.RequestUserAuthorization(UserAuthorization.WebCam); show_text = GameObject.FindGameObjectWithTag("ShowText").GetComponent<UnityEngine.UI.Text>(); background = GameObject.FindWithTag("CamBackground").GetComponent<RawImage>(); UnityAndroidDemo = CreateUnityAndroidDemo(); if (Application.HasUserAuthorization(UserAuthorization.WebCam)) { WebCamDevice[] devices = WebCamTexture.devices; if (devices.Length == 0) { // Debug.Log("No camera detected!"); show_text.text += "No camera detected!\n"; yield break; } bool find_camera = false; for (int i = 0; i < devices.Length; i++) { // Debug.Log("Found camera:" + devices[i].name); show_text.text += ("Found camera:" + devices[i].name + "\n"); if (cam_name.Equals(devices[i].name)) { find_camera = true; } } if (!find_camera) { show_text.text += ("Unable to find camera: " + cam_name + "\n"); show_text.text += ("Open the first camera" + devices[0].name + "\n"); cam_name = devices[0].name; } cam = new WebCamTexture(cam_name, width, height, fps); WebCamTexture.allowThreadedTextureCreation = true; WebCamTexture.streamingTextureDiscardUnusedMips = true; cam.Play(); show_text.text += (cam_name +" Running...\n"); } } void OnDestroy() { if (UnityAndroidDemo != IntPtr.Zero) { DestroyUnityAndroidDemo(UnityAndroidDemo); UnityAndroidDemo = IntPtr.Zero; } } // Update is called once per frame void Update() { if (cam_data == null) { cam_data = new Color32[cam.width * cam.height]; } if (tex == null) { tex = new Texture2D(cam.width, cam.height); } if (cam != null && cam.isPlaying) { cam_data = cam.GetPixels32(); Threshold(UnityAndroidDemo, ref cam_data, cam.width, cam.height); tex.SetPixels32(cam_data); tex.Apply(); background.texture = tex; show_text.text += "ProcessImage\n"; } } }
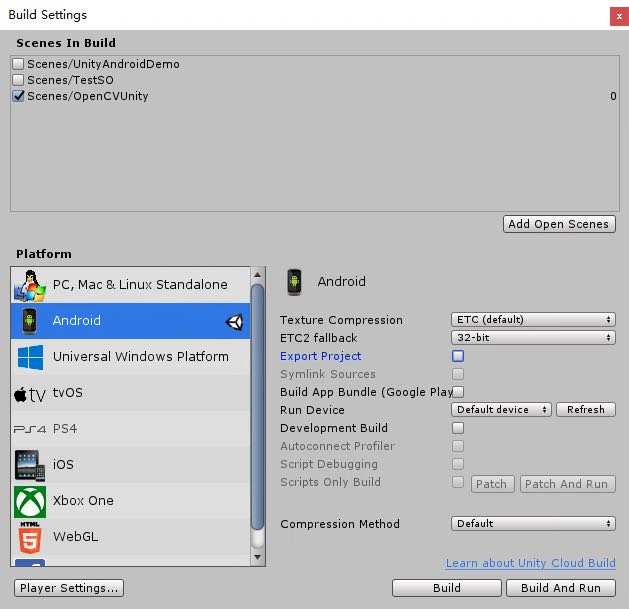
File->Build Settings..,Add Open Scenes选择当前场景,Switch Platform到Android。
build_setting
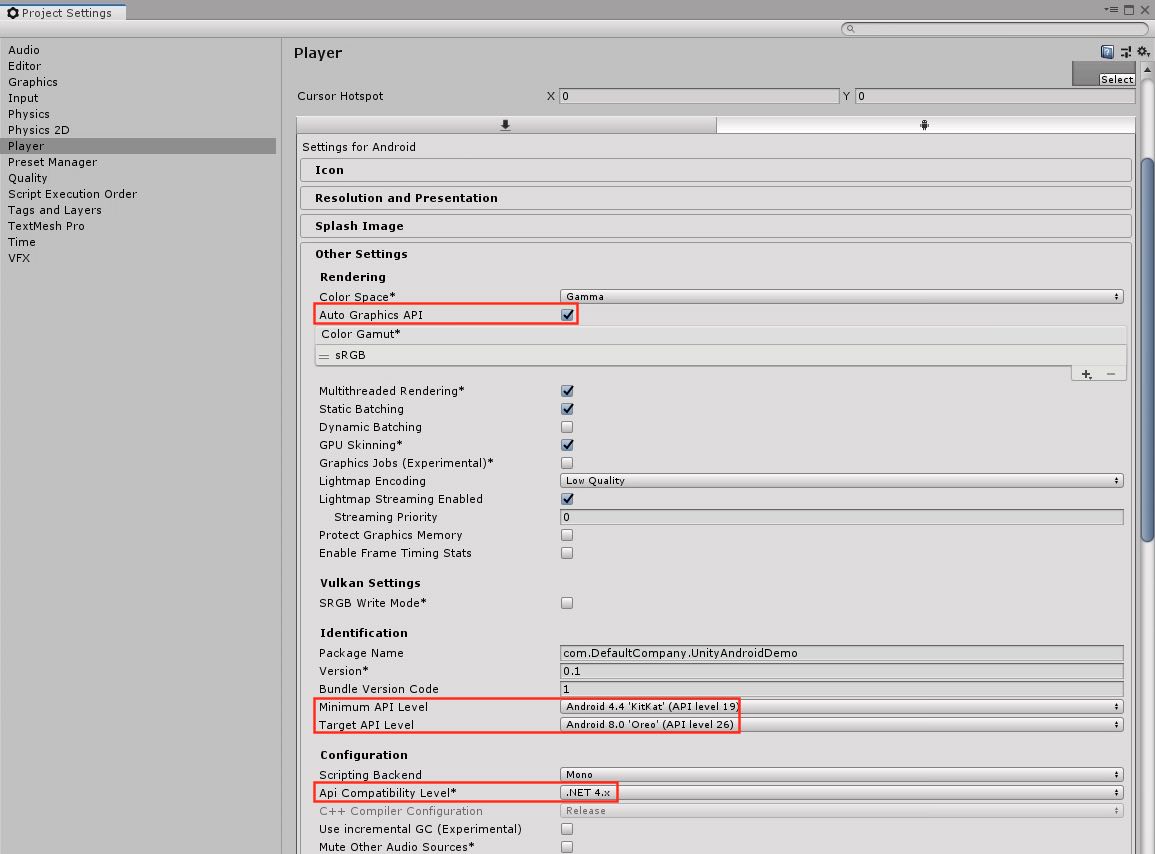
打开Player Settings,注意红框的选择:
play_settings
Build生成UnityAndroidDemo.apk。
Test
我使用Genymotion虚拟机来测试。选择生成一款8.0-API 26的设备,下载Genymotion-ARM-Translation_for_8.0 并且拖到虚拟机中安装,使得虚拟机能够执行ARM指令。
将UnityAndroidDemo.apk中拖入到虚拟机中进行测试,注意要打开摄像头的权限。
VIDEO