Jetson Nano PWM Support
Pinmux Configuration
Download the Jetson_Nano_DeveloperKit_Users_Pinmux_Configuration.
Open the file in Microsoft Excel and ensure that the spreadsheet file is writable and macros are enabled1.
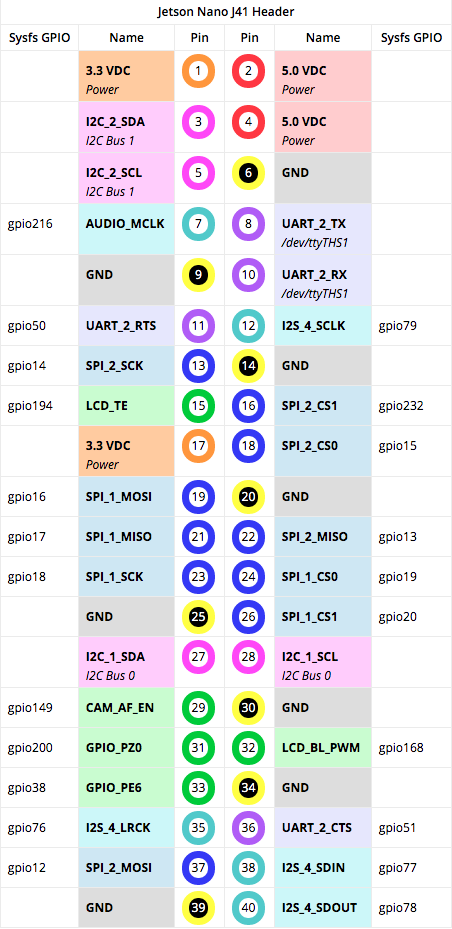
Change the Customer Usage of pin GPIO13(33, GPIO_PE6) to PM3_PWM2 and the pin direction to Output.
Click the Generate DT file button to export your pinmux
configuration. When prompted, enter the board name jetson-nano-sd. The
spreadsheet creates two device tree source files
tegra210-jetson_nano-sd-gpio-default.dtsi and
tegra210-jetson_nano-sd-pinmux.dtsi.
Under the File menu in Excel, select Save As, enter the filename
jetson-nano-sd.csv, select CSV UTF-8 (comma-delimited)
(*.csv) from the menu of filetypes, click Save
L4T Driver Package
On your Linux host, download and extract the L4T Jetson Nano R32.1 Jetson Driver Package.
Go to the directory Linux_for_Tegra and run the script source_sync.sh to download the various source trees. When prompted, enter the correct tag for the L4T version you are using. The release tag name can be found in the L4T Release Notes. For example, for L4T release 32.1, enter the tag tegra-l4t-r32.1.
You can use Jetson stats to find the L4T Release Notes.
1 | cd Linux_for_Tegra/ |
export CROSS_COMPILE=/usr/bin/aarch64-linux-gnu-
Jetson_nano_40-pin_expansion_header.pdf↩︎