本文主要参考博客Unity3D 与 Python 的
Socket 通信简单指南。
Unity3D Client端
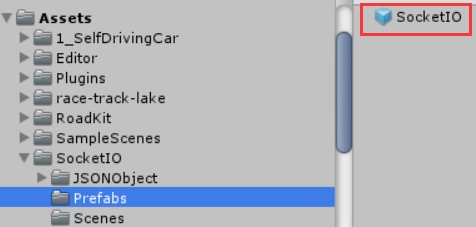
Unity3D新建一个Project,Window - Asset Store,搜索Socket.IO for Unity进行安装。Import成功后,Project目录Assets中会出现SocketIO文档。
Project目录中选择Assets - SoketIO - Prefabs,将该目录下的SocketIO拖入到场景中,如下图所示:
检查场景中SocketIO的Url属性:
1
| ws://127.0.0.1:4567/socket.io/?EIO=4&transport=websocket
|
在SampleScene栏目中右键,Create Empty建立一个空白的Object,命名为TestSocket。选择TestSocket,在Inspector窗口中点击Add Component - New script,命名为TestSocketScript,双击脚本进行编辑:
1
2
3
4
5
6
7
8
9
10
11
12
13
14
15
16
17
18
19
20
21
22
23
24
25
26
27
28
29
30
31
32
33
34
35
36
37
38
39
40
41
42
43
44
45
46
47
48
49
50
51
52
53
54
55
56
57
58
59
| using System.Collections.Generic;
using UnityEngine;
using SocketIO;
public class TestSocketScript : MonoBehaviour
{
// 在 Editor 里把 SocketIO 拖过来
public SocketIOComponent sio;
void Start()
{
if (sio == null)
Debug.LogError("Drop a SocketIOComponent to Me!");
// 声明 connect 事件和 server_sent 事件的回调函数
sio.On("connect", OnConnect);
sio.On("server_sent", OnReceive);
}
/// <summary>
/// connect 事件的回调函数
/// </summary>
/// <param name="obj"></param>
void OnConnect(SocketIOEvent obj)
{
Debug.Log("Connection Open");
OnReceive(obj);
}
/// <summary>
/// 接收到 server_sent 事件的回调函数
/// </summary>
/// <param name="obj">SocketIOEvent</param>
void OnReceive(SocketIOEvent obj)
{
// 1. 接收并输出 Server 传递过来的数字
JSONObject jsonObject = obj.data;
string rcv_nbr = jsonObject.GetField("nbr").str;
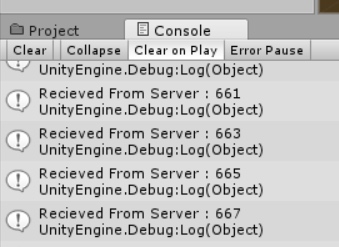
Debug.Log("Recieved From Server : " + rcv_nbr);
// 2. 将数字 +1 并返回给 Server
try
{
int int_nbr = int.Parse(rcv_nbr);
SendToServer(int_nbr + 1);
}
catch
{
}
}
/// <summary>
/// 将数字发给 Server
/// </summary>
/// <param name="_nbr">发送的数字</param>
void SendToServer(int _nbr)
{
Dictionary<string, string> data = new Dictionary<string, string>();
data["nbr"] = _nbr.ToString();
sio.Emit("client_sent", new JSONObject(data));
}
}
|
此时Inspector窗口的Test Socket Script(Script)中会新增一个Sio属性:
 sio1
sio1
将SampleScene栏目的SocketIO拖动到Sio属性里:
 sio2
sio2
Python版Server端
1
2
3
| sudo pip2 install python-socketio
sudo pip2 install eventlet
sudo pip2 install Flask
|
1
2
3
4
5
6
7
8
9
10
11
12
13
14
15
16
17
18
19
20
21
22
23
24
25
26
27
28
29
30
31
32
33
| import socketio
import eventlet
import eventlet.wsgi
from flask import Flask
sio = socketio.Server()
app = Flask(__name__)
# "连接建立的回调函数"
@sio.on('connect')
def on_connect(sid, environ):
print("connect ", sid)
send_to_client(101)
# "接收 Client 事件 (client_sent) 的回调函数"
@sio.on('client_sent')
def on_revieve(sid, data):
if data:
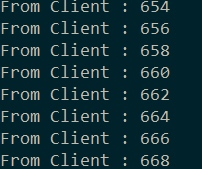
print ('From Client : %s' % data['nbr'])
send_to_client(int(data['nbr']) + 1)
else:
print ('Recieved Empty Data!')
# "向 Client 发送数字"
def send_to_client(_nbr):
sio.emit(
'server_sent',
data = {'nbr':_nbr.__str__()},
skip_sid=True)
if __name__ == '__main__':
app = socketio.Middleware(sio, app)
eventlet.wsgi.server(eventlet.listen(('', 4567)), app)
|
先运行Python程序,再运行Unity3D场景: