Hanjie's Blog

一只有理想的羊驼

在三维空间里讨论旋转的时候,有两种常见的视角——坐标轴旋转和坐标变换。虽然它们可能看似相似,但在实际应用上存在显著区别。以下是它们的详细解释:

1. 坐标轴旋转(Active Rotation)

坐标轴旋转有时也被称为 "矢量旋转" 或 "主动旋转" (Active Rotation)。在这种解析下,我们旋转的是对象本身。换句话说,坐标轴保持不变,旋转的是矢量或点。

例子: 如果我们绕 y 轴逆时针旋转一个矢量 v = (1, 0, 0):

旋转矩阵$ R_y(90^)$ 为:

\[ R_y(90^\circ) = \begin{pmatrix} 0 & 0 & 1 \\ 0 & 1 & 0 \\ -1 & 0 & 0 \end{pmatrix} \]

应用旋转矩阵到矢量 v:

\[ v' = R_y(90^\circ) \begin{pmatrix} 1 \\ 0 \\ 0 \end{pmatrix} = \begin{pmatrix} 0 \\ 0 \\ -1 \end{pmatrix} \]

这里 v' 是旋转后的矢量。这表示在原始坐标系中,方向 (1, 0, 0) 旋转 90 度后变为方向 (0, 0, -1)。

2. 坐标变换(Passive Rotation)

坐标变换有时也被称为 "坐标系旋转" 或 "被动旋转" (Passive Rotation)。在这种解析下,我们其实是在旋转坐标系本身,矢量或点保持不变。

假设我们仍然使用绕 y 轴逆时针旋转 90 度的例子:

新的坐标系中的基向量会变成: - 新的 x 轴方向:之前的 (1, 0, 0) 旋转后现在方向是 (0, 0, -1)。 - 新的 z 轴方向:之前的 (0, 0, 1) 旋转后现在方向是 (1, 0, 0)。

在旋转后的坐标系中,基向量变换矩阵将会是(对比原始坐标系):

\[ M = \begin{pmatrix} 0 & 0 & -1 \\ 0 & 1 & 0 \\ 1 & 0 & 0 \end{pmatrix}\]

在被动旋转的情况下,逆变换矩阵 $R_y{-1}(90) $ 应用于矢量:

\[R_y^{-1}(90^\circ) = R_y(-90^\circ) = \begin{pmatrix} 0 & 0 & -1 \\ 0 & 1 & 0 \\ 1 & 0 & 0 \end{pmatrix} \]

应用变换:

\[ v = R_y^{-1}(90^\circ) v' \]

基于这个理解,可以得到:

\[ \begin{pmatrix} 1 \\ 0 \\ 0 \end{pmatrix} = R_y^{-1}(90^\circ) \begin{pmatrix} 0 \\ 0 \\ -1 \end{pmatrix} \]

总结

  • 坐标轴旋转(Active Rotation):在这种情况下,坐标轴保持不变,旋转的是矢量。因此,对应的旋转矩阵直接应用于矢量或点。
  • 坐标变换(Passive Rotation):在这种情况下,坐标系在旋转,但矢量或点保持不变。因此,我们要应用逆旋转矩阵(反向旋转矩阵)来转换矢量。

这两个方法本质上描述了相同的几何变换,但应用的视角和方式不同。

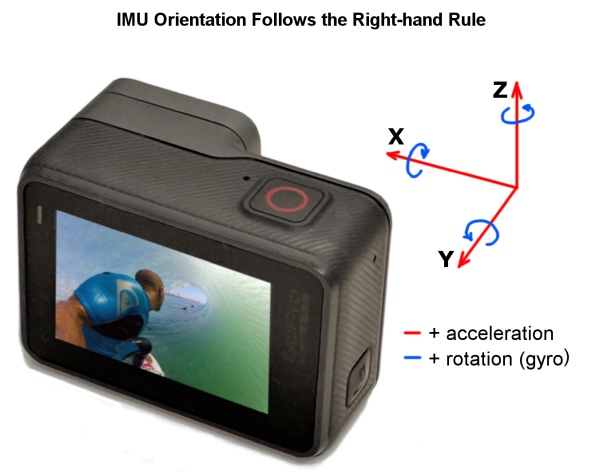
在EIS(电子图像稳定)系统中,实现Horizon Lock功能的目的是确保相机的水平方向保持稳定,即在世界坐标系中,相机的视图水平线与地平线保持一致。根据题目定义: 世界坐标系:Z轴向上。 IMU坐标系:X轴指向设备左边,Y轴指向内(设备背面),Z轴指向设备上边,视图方向(view direction)为Y轴负方向。 输入数据:有一系列从IMU坐标系到世界坐标系的四元数数组std::vector<Eigen::Quaterniond> quats。Horizon Lock的核心是补偿相机的滚转(roll)角度,使得相机的上方向(IMU坐标系的Z轴)在世界坐标系中尽可能与世界Z轴对齐,同时保持视图方向不变。下面是实现的具体步骤:

实现思路

  1. 理解四元数作用 每个四元数 q表示从IMU坐标系到世界坐标系的旋转。对于IMU坐标系中的向量 \(\mathbf{v}_{\text{imu}}\),可以通过 \(\mathbf{v}_{\text{world}} = q \cdot \mathbf{v}_{\text{imu}}\)转换到世界坐标系(使用Eigen库的四元数运算规则)。
  2. 确定关键方向
    视图方向:在IMU坐标系中,视图方向是Y轴负方向,即 \(\begin{pmatrix} 0 \\ -1 \\ 0 \end{pmatrix}\)。在世界坐标系中,视图方向为 \(\mathbf{d} = q \cdot \begin{pmatrix} 0 \\ -1 \\ 0 \end{pmatrix}\)。 上方向:在IMU坐标系中,上方向是Z轴,即 \(\begin{pmatrix} 0 \\ 0 \\ 1 \end{pmatrix}\)。在世界坐标系中,当前上方向为 \(q \cdot \begin{pmatrix} 0 \\ 0 \\ 1 \end{pmatrix}\)
  3. Horizon Lock目标 保持视图方向 \(\mathbf{d}\)不变,同时调整旋转,使得相机的上方向在世界坐标系中与世界Z轴 \(\begin{pmatrix} 0 \\ 0 \\ 1 \end{pmatrix}\)的投影对齐(在与 \(\mathbf{d}\)垂直的平面内)。
  4. 调整方法 通过在IMU坐标系中围绕Y轴(视图方向的轴)施加一个额外的旋转 r,生成新的四元数 \(q_{\text{lock}} = q \cdot r\),使得:视图方向保持为 \(\mathbf{d}\)。上方向尽可能与世界Z轴对齐。

具体实现步骤

对于四元数数组中的每个四元数 q,按以下步骤处理: ### 计算视图方向 在IMU坐标系中,视图方向为 \(\begin{pmatrix} 0 \\ -1 \\ 0 \end{pmatrix}\)。使用四元数q将其转换到世界坐标系:

\[\mathbf{d} = q \cdot \begin{pmatrix} 0 \\ -1 \\ 0 \end{pmatrix}\]

这里 \(\mathbf{d}\)是世界坐标系中的视图方向向量。

计算期望的上方向\(\mathbf{up}_{\text{desired}}\)

在实现Horizon Lock功能(如在电子图像稳定系统中)时,我们需要计算一个期望的上方向\(\mathbf{up}_{\text{desired}}\),以确保相机的水平方向在世界坐标系中与地平线保持一致,同时不改变相机的视图方向\(\mathbf{d}\)

我们希望计算的期望上方向\(\mathbf{up}_{\text{desired}}\)满足以下两个条件:

  • \(\mathbf{up}_{\text{desired}}\)是世界坐标系中,相机的上方向应该指向的方向,尽可能与世界Z轴\(\begin{pmatrix} 0 \\ 0 \\ 1 \end{pmatrix}\)对齐。
  • 为了保持视图方向不变,\(\mathbf{up}_{\text{desired}}\)必须与视图方向\(\mathbf{d}\)垂直。

其中:

  • 视图方向\(\mathbf{d}\)是相机在世界坐标系中指向的方向(通常为相机光轴的方向)。
  • 世界Z轴\(\mathbf{w} = \begin{pmatrix} 0 \\ 0 \\ 1 \end{pmatrix}\)表示世界坐标系的上方向。

为了实现Horizon Lock,我们需要调整相机的滚动(roll)角度,使得相机的上方向与\(\mathbf{up}_{\text{desired}}\)对齐,同时保持\(\mathbf{d}\)不变。

步骤 1:计算世界Z轴在视图方向\(\mathbf{d}\)上的投影 首先,我们需要将世界Z轴\(\mathbf{w}\)分解为两个分量:

  • 一个分量是\(\mathbf{w}\)\(\mathbf{d}\)方向上的投影(平行于\(\mathbf{d}\))。
  • 另一个分量是\(\mathbf{w}\)在与\(\mathbf{d}\)垂直的平面上的分量(垂直于\(\mathbf{d}\))。

\(\mathbf{w}\)\(\mathbf{d}\)上的投影公式为:

\[\text{proj}_{\mathbf{d}} \mathbf{w} = \left( \mathbf{w} \cdot \mathbf{d} \right) \mathbf{d}\]

其中:

  • \(\mathbf{w} \cdot \mathbf{d}\)\(\mathbf{w}\)\(\mathbf{d}\)的点积,计算\(\mathbf{w}\)\(\mathbf{d}\)方向上的分量大小。
  • \(\mathbf{d}\)是单位向量(如果不是,需要先归一化)。

这个投影分量\(\text{proj}_{\mathbf{d}} \mathbf{w}\)表示\(\mathbf{w}\)中与\(\mathbf{d}\)平行的部分。

步骤 2:计算世界Z轴在与\(\mathbf{d}\)垂直的平面上的分量 为了得到与\(\mathbf{d}\)垂直的分量,我们从\(\mathbf{w}\)中减去其在\(\mathbf{d}\)上的投影:

\[\mathbf{up}_{\text{desired}} = \mathbf{w} - \text{proj}_{\mathbf{d}} \mathbf{w}\]

代入投影公式:

\[\mathbf{up}_{\text{desired}} = \mathbf{w} - \left( \mathbf{w} \cdot \mathbf{d} \right) \mathbf{d}\]

这个\(\mathbf{up}_{\text{desired}}\)就是\(\mathbf{w}\)在与\(\mathbf{d}\)垂直的平面上的分量。

步骤 3:归一化\(\mathbf{up}_{\text{desired}}\)

\[\mathbf{up}_{\text{desired}} = \frac{\mathbf{up}_{\text{desired}}}{\|\mathbf{up}_{\text{desired}}\|}\]

转换到IMU坐标系

\(\mathbf{up}_{\text{desired}}\)从世界坐标系转换回IMU坐标系:

\[\mathbf{up}_{\text{desired}}^{\text{imu}} = q^{-1} \cdot \mathbf{up}_{\text{desired}}\]

由于 \(\mathbf{up}_{\text{desired}}\)\(\mathbf{d}\)垂直,且 \(q^{-1} \cdot \mathbf{d} = \begin{pmatrix} 0 \\ -1 \\ 0 \end{pmatrix}\),因此 \(\mathbf{up}_{\text{desired}}^{\text{imu}}\)的Y分量为零,即形如 \(\begin{pmatrix} a \\ 0 \\ b \end{pmatrix}\)

计算旋转角度

现在,我们需要在IMU坐标系中找到一个旋转角度\(\theta\),使得IMU坐标系中的当前上方向 \(\mathbf{up}_{\text{current}}^{\text{imu}} = \begin{pmatrix} 0 \\ 0 \\ 1 \end{pmatrix}\)(即Z轴)通过围绕Y轴旋转\(\theta\)后,与\(\mathbf{up}_{\text{desired}}^{\text{imu}}\)对齐。

由于旋转是围绕Y轴进行的,我们可以将问题简化到XZ平面上的二维旋转问题。以下是详细的推导过程:

  1. 分析旋转过程:

旋转轴是Y轴(视图方向),因此旋转只影响X和Z分量,Y分量保持不变。

在XZ平面上,当前上方向\(\mathbf{up}_{\text{current}}^{\text{imu}}\)的投影是\(\begin{pmatrix} 0 \\ 1 \end{pmatrix}\)(即Z轴)。

期望上方向\(\mathbf{up}_{\text{desired}}^{\text{imu}}\)的投影是\(\begin{pmatrix} a \\ b \end{pmatrix}\)

我们需要找到一个角度\(\theta\),使得从\(\begin{pmatrix} 0 \\ 1 \end{pmatrix}\)旋转到\(\begin{pmatrix} a \\ b \end{pmatrix}\),方向遵循右手定则。

  1. 使用\(\text{atan2}\)函数计算角度: 在二维平面上(这里是XZ平面),从向量\(\mathbf{v}_1 = \begin{pmatrix} x_1 \\ z_1 \end{pmatrix}\)到向量\(\mathbf{v}_2 = \begin{pmatrix} x_2 \\ z_2 \end{pmatrix}\)的旋转角度\(\theta\)可以通过以下公式计算:

\[\theta = \text{atan2}(x_2, z_2) - \text{atan2}(x_1, z_1)\]

角度 \(\theta_1 = \text{atan2}(y_1, x_1)\)\(\mathbf{v}_1\)相对于X轴正方向的角度。 角度 \(\theta_2 = \text{atan2}(y_2, x_2)\)\(\mathbf{v}_2\)相对于X轴正方向的角度。 两个向量之间的有向角度就是从\(\mathbf{v}_1\)\(\mathbf{v}_2\)的夹角,可以表示为:\(\text{angle} = \theta_2 - \theta_1\)

在 XZ 平面中,我们希望计算从正 Z 轴到向量的逆时针旋转角度。因此我们使用\(\text{atan2}(x, z)\)

在本问题中:

\(\mathbf{v}_1 = \begin{pmatrix} 0 \\ 1 \end{pmatrix}\),因此\(\text{atan2}(x_1, z_1) = \text{atan2}(0, 1) = 0\)\(\mathbf{v}_2 = \begin{pmatrix} a \\ b \end{pmatrix}\),因此\(\text{atan2}(x_2, z_2) = \text{atan2}(a, b)\)

代入公式,旋转角度\(\theta\)为:

\[\theta = \text{atan2}(a, b) - 0 = \text{atan2}(a, b)\]

其中:

\(a = \mathbf{up}_{\text{desired}}^{\text{imu}}.x\)(期望上方向的X分量)。 \(b = \mathbf{up}_{\text{desired}}^{\text{imu}}.z\)(期望上方向的Z分量)。

\(\text{atan2}(a, b)\)返回的角度\(\theta\)是从正Z轴到向量\(\begin{pmatrix} a \\ b \end{pmatrix}\)的旋转角度,范围在\([- \pi, \pi]\)内。

  1. 旋转方向的解释: 如果\(\theta > 0\),表示逆时针旋转(从Z轴向X轴正方向)。 如果\(\theta < 0\),表示顺时针旋转。

构造旋转四元数:

\[r = \text{Eigen::AngleAxisd}(\theta, \text{Eigen::Vector3d}(0, 1, 0))\]

生成新的四元数

将补偿旋转 \(r\)应用于原始四元数 \(q\)

\[q_{\text{lock}} = q \cdot r\]

注意:四元数相乘顺序表示先应用 \(r\)(局部旋转),再应用 \(q\)(到世界坐标系)。

代码实现

1
2
3
4
5
6
7
8
9
10
11
12
13
14
15
16
17
18
19
20
21
22
23
24
25
26
27
28
29
30
31
32
33
34
35
36
37
#include <Eigen/Geometry>
#include <vector>

std::vector<Eigen::Quaterniond> processHorizonLock(const std::vector<Eigen::Quaterniond>& quats) {
std::vector<Eigen::Quaterniond> quats_locked;
quats_locked.reserve(quats.size());

for (const auto& q : quats) {
// 步骤1:计算世界坐标系中的视图方向
Eigen::Vector3d view_dir_imu(0, -1, 0);
Eigen::Vector3d d = q * view_dir_imu;

// 步骤2:计算期望的上方向(世界坐标系)
Eigen::Vector3d world_up(0, 0, 1);
Eigen::Vector3d up_desired = world_up - world_up.dot(d) * d;

// 步骤3:归一化
up_desired.normalize();

// 步骤4:转换到IMU坐标系
Eigen::Vector3d up_desired_imu = q.inverse() * up_desired;

// 步骤5:计算旋转角度θ
double theta = std::atan2(up_desired_imu.x(), up_desired_imu.z());

// 步骤6:构造滚转补偿四元数
Eigen::AngleAxisd r(theta, Eigen::Vector3d(0, 1, 0));
Eigen::Quaterniond r_quat(r);

// 步骤7:生成新的四元数
Eigen::Quaterniond q_lock = q * r_quat;

quats_locked.push_back(q_lock);
}

return quats_locked;
}

部署平台: MacBook Pro M1 Max 32GB macOS Sonoma 14.7.2

Ollama

Ollama官方网站中下载Ollama,然后打开按指示安装。

ollama_download

安装后打开终端,测试是否正常运行:

1
2
❯ ollama --version                                                                            
ollama version is 0.5.7

然后启动服务:

1
ollama serve
1
2
3
4
5
6
7
8
9
10
11
12
13
14
15
16
17
18
19
20
21
22
23
24
25
26
27
28
29
30
31
32
33
34
35
36
2025/02/05 19:07:01 routes.go:1187: INFO server config env="map[HTTPS_PROXY: HTTP_PROXY: NO_PROXY: OLLAMA_DEBUG:false OLLAMA_FLASH_ATTENTION:false OLLAMA_GPU_OVERHEAD:0 OLLAMA_HOST:http://localhost:8080 OLLAMA_KEEP_ALIVE:5m0s OLLAMA_KV_CACHE_TYPE: OLLAMA_LLM_LIBRARY: OLLAMA_LOAD_TIMEOUT:5m0s OLLAMA_MAX_LOADED_MODELS:0 OLLAMA_MAX_QUEUE:512 OLLAMA_MODELS:/Users/luohanjie/.ollama/models OLLAMA_MULTIUSER_CACHE:false OLLAMA_NOHISTORY:false OLLAMA_NOPRUNE:false OLLAMA_NUM_PARALLEL:0 OLLAMA_ORIGINS:[http://localhost https://localhost http://localhost:* https://localhost:* http://127.0.0.1 https://127.0.0.1 http://127.0.0.1:* https://127.0.0.1:* http://0.0.0.0 https://0.0.0.0 http://0.0.0.0:* https://0.0.0.0:* app://* file://* tauri://* vscode-webview://*] OLLAMA_SCHED_SPREAD:false http_proxy: https_proxy: no_proxy:]"
time=2025-02-05T19:07:01.625+08:00 level=INFO source=images.go:432 msg="total blobs: 0"
time=2025-02-05T19:07:01.625+08:00 level=INFO source=images.go:439 msg="total unused blobs removed: 0"
[GIN-debug] [WARNING] Creating an Engine instance with the Logger and Recovery middleware already attached.

[GIN-debug] [WARNING] Running in "debug" mode. Switch to "release" mode in production.
- using env: export GIN_MODE=release
- using code: gin.SetMode(gin.ReleaseMode)

[GIN-debug] POST /api/pull --> github.com/ollama/ollama/server.(*Server).PullHandler-fm (5 handlers)
[GIN-debug] POST /api/generate --> github.com/ollama/ollama/server.(*Server).GenerateHandler-fm (5 handlers)
[GIN-debug] POST /api/chat --> github.com/ollama/ollama/server.(*Server).ChatHandler-fm (5 handlers)
[GIN-debug] POST /api/embed --> github.com/ollama/ollama/server.(*Server).EmbedHandler-fm (5 handlers)
[GIN-debug] POST /api/embeddings --> github.com/ollama/ollama/server.(*Server).EmbeddingsHandler-fm (5 handlers)
[GIN-debug] POST /api/create --> github.com/ollama/ollama/server.(*Server).CreateHandler-fm (5 handlers)
[GIN-debug] POST /api/push --> github.com/ollama/ollama/server.(*Server).PushHandler-fm (5 handlers)
[GIN-debug] POST /api/copy --> github.com/ollama/ollama/server.(*Server).CopyHandler-fm (5 handlers)
[GIN-debug] DELETE /api/delete --> github.com/ollama/ollama/server.(*Server).DeleteHandler-fm (5 handlers)
[GIN-debug] POST /api/show --> github.com/ollama/ollama/server.(*Server).ShowHandler-fm (5 handlers)
[GIN-debug] POST /api/blobs/:digest --> github.com/ollama/ollama/server.(*Server).CreateBlobHandler-fm (5 handlers)
[GIN-debug] HEAD /api/blobs/:digest --> github.com/ollama/ollama/server.(*Server).HeadBlobHandler-fm (5 handlers)
[GIN-debug] GET /api/ps --> github.com/ollama/ollama/server.(*Server).PsHandler-fm (5 handlers)
[GIN-debug] POST /v1/chat/completions --> github.com/ollama/ollama/server.(*Server).ChatHandler-fm (6 handlers)
[GIN-debug] POST /v1/completions --> github.com/ollama/ollama/server.(*Server).GenerateHandler-fm (6 handlers)
[GIN-debug] POST /v1/embeddings --> github.com/ollama/ollama/server.(*Server).EmbedHandler-fm (6 handlers)
[GIN-debug] GET /v1/models --> github.com/ollama/ollama/server.(*Server).ListHandler-fm (6 handlers)
[GIN-debug] GET /v1/models/:model --> github.com/ollama/ollama/server.(*Server).ShowHandler-fm (6 handlers)
[GIN-debug] GET / --> github.com/ollama/ollama/server.(*Server).GenerateRoutes.func1 (5 handlers)
[GIN-debug] GET /api/tags --> github.com/ollama/ollama/server.(*Server).ListHandler-fm (5 handlers)
[GIN-debug] GET /api/version --> github.com/ollama/ollama/server.(*Server).GenerateRoutes.func2 (5 handlers)
[GIN-debug] HEAD / --> github.com/ollama/ollama/server.(*Server).GenerateRoutes.func1 (5 handlers)
[GIN-debug] HEAD /api/tags --> github.com/ollama/ollama/server.(*Server).ListHandler-fm (5 handlers)
[GIN-debug] HEAD /api/version --> github.com/ollama/ollama/server.(*Server).GenerateRoutes.func2 (5 handlers)
time=2025-02-05T19:07:01.625+08:00 level=INFO source=routes.go:1238 msg="Listening on 127.0.0.1:8080 (version 0.5.7)"
time=2025-02-05T19:07:01.625+08:00 level=INFO source=routes.go:1267 msg="Dynamic LLM libraries" runners=[metal]
time=2025-02-05T19:07:01.652+08:00 level=INFO source=types.go:131 msg="inference compute" id=0 library=metal variant="" compute="" driver=0.0 name="" total="21.3 GiB" available="21.3 GiB"

Deepseek

Ollama Models网页中,可以查看到支持的Deepseek模型,根据显存大小选择所用的模型:

模型 显存大小(GB)
1.5b 2
7b、8b 4~8
14b 12
32b 24

这里我们选择使用32b模型,在终端输入下面指令进行模型下载:

1
ollama pull deepseek-r1:32b 

下载完成后,即可在终端进行对话:

1
2
3
4
5
6
7
8
9
10
11
12
13
14
15
pulling manifest 
pulling 6150cb382311... 100% ▕█████████████████████████████████████████████████████████████████████████████████████████████████████████████████████████▏ 19 GB
pulling 369ca498f347... 100% ▕█████████████████████████████████████████████████████████████████████████████████████████████████████████████████████████▏ 387 B
pulling 6e4c38e1172f... 100% ▕█████████████████████████████████████████████████████████████████████████████████████████████████████████████████████████▏ 1.1 KB
pulling f4d24e9138dd... 100% ▕█████████████████████████████████████████████████████████████████████████████████████████████████████████████████████████▏ 148 B
pulling c7f3ea903b50... 100% ▕█████████████████████████████████████████████████████████████████████████████████████████████████████████████████████████▏ 488 B
verifying sha256 digest
writing manifest
success
>>> 你好
<think>

</think>

你好!很高兴见到你,有什么我可以帮忙的吗?无论是学习、工作还是生活中的问题,都可以告诉我哦! 😊

输入\bye退出对话。

VSCode Continue

在VSCode的EXTENSIONS中查询Continue插件并且安装。

Continue

然后在VSCode左侧栏会新加一个Continue的按钮,点击进去。在上对话框点击CLaude 3.5 Sonnet旁边ˇ,选择Add Chat model

Continue2

弹出窗口中,Provide选择Ollama,Model选择Autodetect(注意打开ollama的app),点击Connect

Continue3

重新点击CLaude 3.5 Sonnet旁边ˇ按钮,选择Autodetect - deepseek-r1:32b

Continue4

然后就可以在对话框中进行对话了:

Continue5

使用

在VSCode中选择代码,鼠标右键选择continue中对应的功能,即可使用代码助手。比如自动代码代码注释:

Continue6

代码优化:

Continue7

自动修复代码:

Continue8
0%